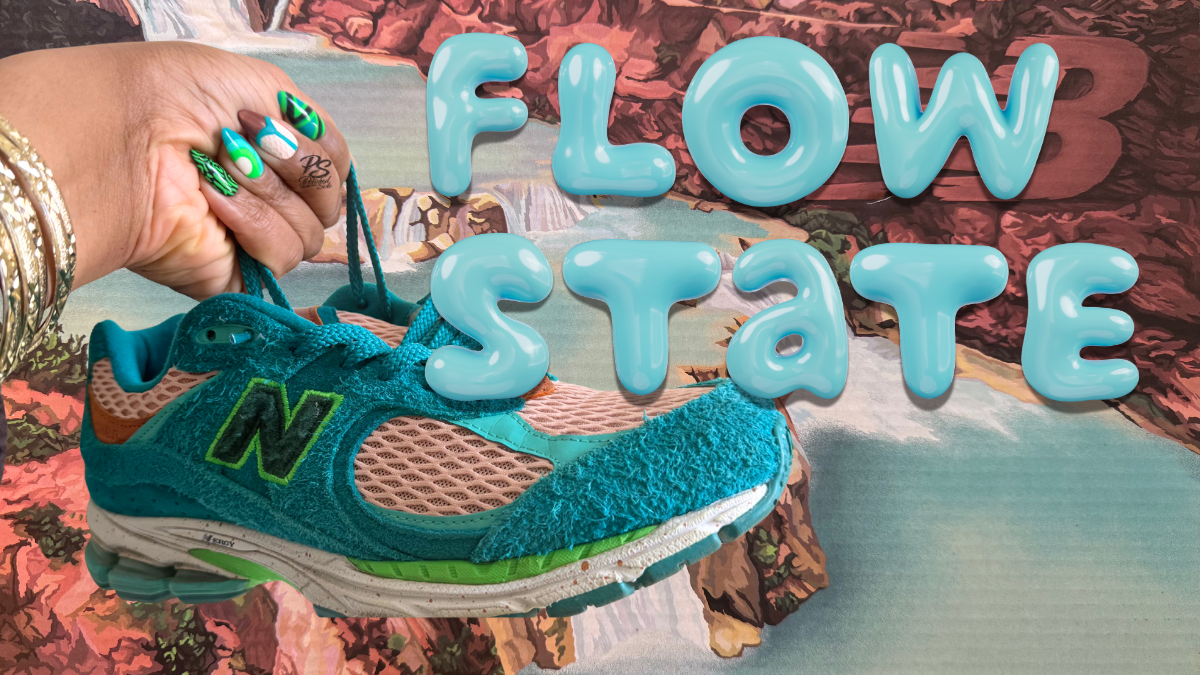
My natural flow state is at my work table, in my living room, watching a psychological thriller, all while creating custom DIY press-on nails. This set, inspired by the New Balance x Salehe Bembury 2002Rs “Water Be The Guide” collaboration, definitely got my creative juices flowing. As you’ll come to find out as I share more of my sneaker-inspired press-on nails, I have quite a few Salehe Bembury collabs in my shoe collection.
Now, I will say up front, as soon as I finished making these press-on nails, I wasn’t in love with them. I love these sneakers, and I wanted matching nails that I loved just as much. I felt like I could’ve come up with better gel polish nail art designs for the index and ring fingers, but it turned out that the simplest design of the set was my favorite.
I learned a lesson with this set, and it’s that even though the nails may not knock your socks off when they’re still on the stand, they’re (nine-times-out-of-ten) going to look amazing on hand.
I got so many compliments on these nails, so let’s dive into how I created them.

The Vision
No surprise here – I used The POLISH Method to think through the nail art design process. Here’s a walkthrough:
Point of View
It was the beginning of March and spring was knocking on the door, temperatures were rising, and the sun was shining a bit brighter. I was finally able to put away my big-ass snow boots and pull out these “Water Be The Guide” 2002Rs which I can only wear during dry weather due to the fuzzy suede material. Since I was able to finally rock these kicks again, it was only right to design a press-on nail set based on them.
For a second, I wanted to create a set that looked like water (glassy cateye and/or water droplet 3D elements), but in the end, I leaned into the colors of the shoe to match the brightness NYC was starting to experience.
Origin
I don’t go out of my way to collect Salehe’s shoes because I’m a super fan or anything, but it just so happens that his designs speak to me, very loudly it seems. The bright teal color of these New Balance x Salehe Bembury 2002Rs was the element I wanted to pull throughout this set. It’s my favorite thing about these sneakers because it inspires a more tropical version of water to me. I’ve only seen teal, clear water in warmer climates, particularly in the Caribbean. Coming out of a cold and gray winter, I really felt these sneakers were like water guiding me into warmer, sunnier days. I know that sounds fake deep, but I promise I’m being for real.
Layout
I chose medium almond for these nails because I usually always choose medium almond for my nails. But it also made sense to stay away from square or coffin nails because water is the main theme here, so the sharp edges of those shapes wouldn’t really flow, y’know?
Inventory
Let’s start with color. I thought I would have to custom mix a color to get the teal as close to the sneakers as possible, but I actually had LanFo C165 gel polish which was an amazing color match. LanFo is a (currently unavailable) brand I bought when I was just starting my at-home press-on nail journey and I was buying gel polish sets. I don’t particularly recommend purchasing gel polish sets from brands you don’t already know you like (I go into this a bit in my DIY Starter Kit post) and I wouldn’t recommend LanFo polishes today. I think the opacity of LanFo gel polishes are great, but I notice there are random fibers in the polish sometimes and that’s not good
I wanted to add a bit of texture to this set to mimic the fuzzy suede on certain parts of the shoes, so I pulled out clear acrylic powder to achieve that. And in a last-minute design decision, I also used the clear acrylic to mimic the texture of the mesh on the shoe’s tongue.
For the finish of this set, it’s mostly glossy top coat, but the clear acrylic provides random matte finishes on two of the nails.
Sketch
Below is a picture of my sketch. Very messy, not so demure.

I did something a little different when I sketched out this design because I truly had no idea what I was doing when I printed out that template. I wrote down all the colors I saw on the shoe, along with the corresponding gel polish colors. Then, as I was figuring out what designs I wanted to do for each nail, I crossed out the colors I didn’t feel like using. (I realized there actually wasn’t any navy in the shoe, which is why that was crossed out.) Typically, I just think through this in my head, but I think I’m going to go through this process on paper moving forward.
You’ll also notice that the thumb design I sketched didn’t make it into the final set. As I was executing the design, it was taking me way too long to get the heart-shaped lines even, and I was too tired to keep trying, so yes, I gave up. But the design I ended up with turned out to be beautiful, so the redirection was a win!
Highlight & Harmonize
As I was sketching, I did the pinky nail last because I was going back and forth about what I wanted to do with it. I was already pulling the teal color throughout the set and considered adding it to the pinky, but the fingerprint pattern at the heel of the shoe was speaking to me. The fingerprint pattern is a signature across most, if not all, Salehe Bembury footwear collabs, so even though I was nervous about attempting it, I went for the fingerprint pattern as the “hero” or “highlight” of the set, but then kept the teal across the other nails for harmony throughout the set. Upon further inspection of the shoe in sunlight, I think the background color of the fingerprint design is teal and not dark green, so I could’ve pulled it through on the pinky, too, but I think the dark green works better.
The Execution
This is a gel polish custom press-on nail set, so I’m going to walk you through this DIY press-on nail tutorial explaining how I work with gel polish for nail art. I don’t work with nail lacquer because it starts drying as soon as it’s out of the bottle, which means I have to work faster and there’s less room for mistakes. With gel polish, no design is permanent until it’s cured, making the nail art design process way less frustrating.
Liner brushes did most of the work in this set. I did pull out magnet/cateye gel for the middle nail, but the other “special” technique I used was the texture created with clear acrylic powder. Using acrylic powder is a nice way to add texture without making design elements too 3D if the “pop out” 3D look isn’t what you’re going for. I’ll quickly break down how I achieve this acrylic powder nail texture in the “Nail by Nail” section below.
Nail by Nail
First up, prep: buff and etch the nails!
I etch the underside of each nail using an e-file to help create a rough surface area so that the nails stay on for at least 2 weeks once applied. I then buff the top of each nail to ensure the gel polish does not peel off.
For this set, both hands mirror each other, but each individual finger has its own design, so I approached the design execution differently.
Alrighty, let’s get into it!

Thumb:
- Clear base coat, 1 coat, cure
- Solid light blue polish all over the nail, 2 coats, cure between each coat
- Matte top coat, 1 coat, cure
- Paint on light green curvy line, 2 coats, cure between each coat
- Clear builder gel, 1 coat, cure
- Glossy top coat, 1 coat, cure
- Paint area above light green line with teal gel polish, 1 coat, cure
- Go over teal area with another coat of teal gel polish, do not cure
- Using tiny scoop*, pour clear acrylic powder over the nail, focusing on the wet teal section; pour acrylic powder over the nail until the teal polish no longer looks very shiny, cure
*The tiny scoop I use is the wide, curved end of a metal cuticle pusher.
Index:
- Clear base coat, 1 coat, cure
- Solid teal gel polish all over the nail, 2 coats, cure
- Matte top coat, 1 coat, cure
- Paint zig-zag line design with dark green gel polish, 2 coats, cure between each coat
- Paint outline of zig-zag line design with light green gel polish, 2 coats, cure between each coat
- Clear builder gel, 1 coat, cure
- Glossy top coat, 1 coat, cure

Middle:
- Clear base coat, 1 coat, cure
- Paint diamond-shaped tip with brown gel polish, 1 coat, cure
- Paint brown magnet/cateye gel over cured brown gel polish, 1 coat, activate magnetic particles with magnet, cure
- Paint the rest of the nail with cream gel polish, 2 coats, cure between each coat
- Clear builder gel over entire nail, 1 coat, cure
- Glossy top coat, 1 coat, cure
- Paint “Y” shape design in teal gel polish, 1 coat, cure
- Go over teal design with another coat of teal gel polish, do not cure
- Using tiny scoop, pour clear acrylic powder over the nail, focusing on the wet teal section; pour acrylic powder over the nail until the teal polish no longer looks very shiny, cure
- Using cream gel polish, paint curvy lines in the cream section of the nail making sure the lines touch at the points so it looks like mesh, do not cure
- Using tiny scoop, pour clear acrylic powder over the nail, focusing on the wet cream section; pour acrylic powder over the nail until the cream polish no longer looks very shiny, cure
Ring:
- Clear base coat, 1 coat, cure
- Paint “C” shape on nail with teal gel polish, 2 coats, cure between each coat
- Paint “C” shape with light blue gel polish next to the teal design, 2 coats, cure between each coat
- Paint “C” shape with light green gel polish next to the light blue design, 2 coats, cure between each coat
- Fill in the rest of the nail with cream gel polish, 2 coats, cure between each coat
- Clear builder gel, 1 coat, cure
- Glossy top coat, 1 coat, cure

Pinky:
- Clear base coat, 1 coat, cure
- Solid dark green color all over the nail, 3 coats, cure between each coat
- Matte top coat, 1 coat, cure
- Mix a tiny bit of embo powder with light green gel polish**, paint on fingerprint pattern, cure
- Clear builder gel, 1 coat, cure
- Glossy top coat, 1 coat, cure
**I mix a bit of embo powder with the polish to thicken it up a bit so that the polish doesn’t level/move as I painted all of the little lines.
Here are a few more tips I think are non-negotiables:
- Always follow the curing instructions based on the safety guidelines for each specific product.
- Use an appropriate UV/LED lamp – at least 48W. Those handheld flashlight ones and tiny 1-nail-at-a-time lamps do not completely cure gel polishes.
- Wear nitrile gloves at all times when handling gel products!
Here’s a step I never skip when making homemade press-on nails:
After each set is done, even when the non-wipe top coat is fully cured, there is likely some residue left on the press-on nails. So I do the following:
- Wipe each nail with a lint-free wipe dampened with 70% isopropyl alcohol.
- Follow with a second lint-free wipe dampened with water and a drop of Dawn dish soap.
- Finish with one final wipe using 70% isopropyl alcohol to ensure any residual inhibition layer is completely removed.
This gives me peace of mind that any residual inhibition layers are completely wiped off.
The Toolkit
Now that you know how I did this set, I’ll fill you in on all of the products I used below.
Don’t be alarmed! I know it looks like a lot, but most of these things are items you buy just once or a couple of times a year. They’re mostly items you likely already have in your DIY Press-on Nail Starter Kit.
Base & Prep:
- Full cover gel nail tips
- Nail stands
- Adhesives to secure the tips to the stand
- Disposable pads to cover the working area
- Nail Drill/E-file
- Nail drill bits
- Nail buffer blocks
- 70% Isopropyl alcohol
- Push-top container for alcohol
- Lint-free wipes
- Clear base coat
- Matte top coat (to layer underneath design work)
- Clear builder gel
- Nitrile gloves
Colors:
- Teal – LanFo C165 (discontinued)
- Light green (index & ring finger) – Custom mix of DND 25 Palm Tree + DND 2523 Garden Games
- Light green (pinky) – Custom mix of yellow + blue from Finger Secret pat gel palette
- Cream – Custom mix of DND 131 Sunday Brunch DIVA + DND 448 Snow Flake
- Light blue – LanFo C168 (discontinued)
- Dark green – LanFo S30 (discontinued)
- Brown – PLA 262 Trick or Treat Yo’self
- Brown magnet/cateye gel – Double Rhythm MC1113
Finishes & Effects:
Tools:
- Liner brushes
- Color mixing palette
- Metal cuticle pusher (tiny scoop for acrylic powder)
- UV/LED lamp
Top Coat:
- Glossy Top Coat – Kokoist Ultra Glossy Top Coat
- Matte Top Coat – Yogurt Gel Cotton Matt Top Gel
