I’m back with more sneaker-inspired nail art!
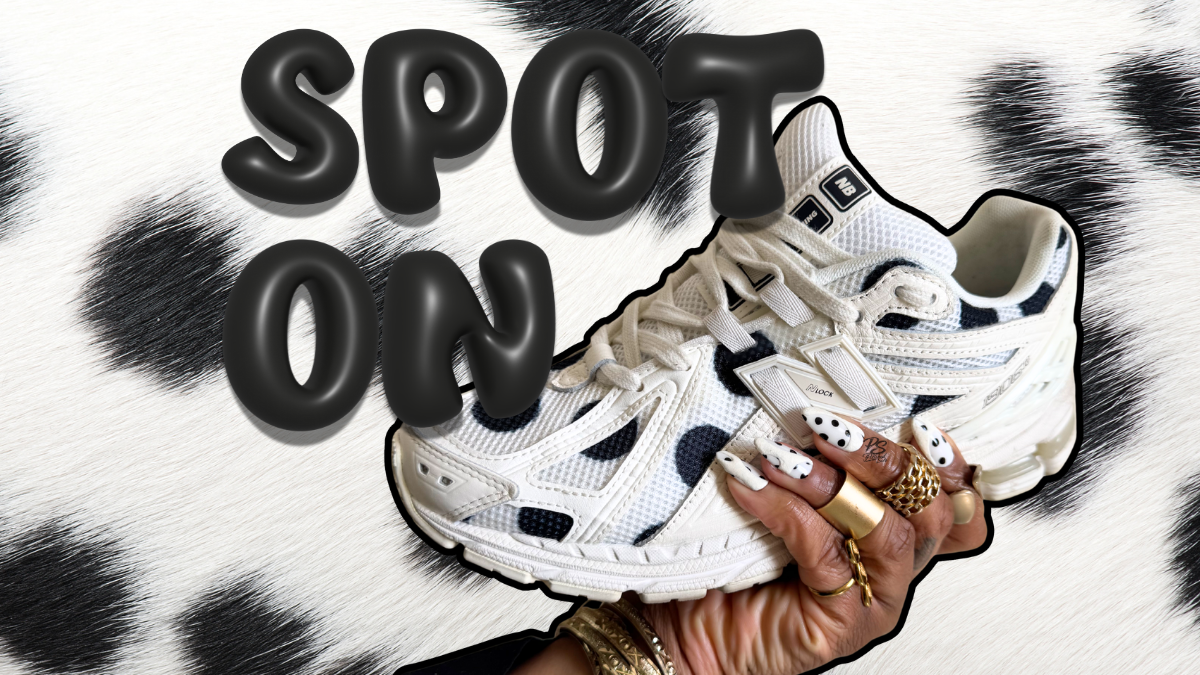
This time, my inspiration for these DIY custom press-on nails was the New Balance 1906 Polka Dot in colors Sea Salt & Phantom. These sneakers were an impulse buy when I copped them back in 2024, but I pull them out multiple times every season, so I’m very happy with my purchase.
I had no idea how these press-on nails would turn out when I decided to design them. I rarely do all-over white nails because the last time I did them, I thought they looked like cheap press-ons. But a couple of years later, with a more refined technique, I think these nails turned out great.
Okie dokie, let’s get into this “Spot On” set.

The Vision
In order to walk you through how I designed this custom press-on nail set, I have to take you through my 6-step design process called The POLISH Method. Ready, set, let’s go!
Point of View
The mood for this set was “make it fun, but don’t do too much.” Sometimes I’m in the mood for a bright/bold/different design on every finger type of nail set, and other times I want to be basic, but never too basic. All love to the “one color, no design” manicure folks, but that’s not my ministry, so I needed a “Basic+” look for this set.
Origin
To find some “Basic+” inspo, I turned to my closet. I’m the type of sneaker enthusiast who has a Google doc filled with pictures of all the shoes in my collection. I keep all my sneakers in their boxes, so I often forget which sneakers I have. When it came time to design these press-ons, I knew I wanted a nail set that was simple, but quirky, so I pulled up my “Sneaker List” Google Doc to find some inspo.
These black and white-ish Polka Dot New Balance 1906s stood out to me because they 100% fit the simple, but quirky brief, and I knew I could pull off an easy-to-do abstract design based on this pair.
Layout
I’m a medium almond nail girlie, so I stuck with that length and shape for this set. I think I could’ve pulled off this design on coffin or square nails, but because circles and curved lines are the main elements of the design, I think it looks best on almond nails.
Inventory
I have a pretty short inventory list for this set. It’s rare for me to only use two colors in press-on nail art, but that’s what happened this time around. I used black and off-white gel polish, and some clear acrylic powder for texture.
Sketch
Below is a picture of my simple (and not so messy!) sketch.

I didn’t spend a ton of time sketching this design because I knew I was going to repeat the design across each nail and only wanted to incorporate two elements: polka dots and abstract lines. I did want to sketch out the abstract lines so that I had a visual to refer to when I started painting the nails.
Highlight & Harmonize
Remember how I said I wanted it to be simple, but quirky? Well, that means no hero nail in this set. Do not fear, because I did include a hero element with the textured 3D lines – I wanted to make sure that particular design element stood out and put the “+” in “Basic+”.
The Execution
Because I prefer gel polish for nail art over nail lacquer, this is a gel polish nail art set. In addition to gel polish, I used clear acrylic powder to create textured abstract lines, similar to the design of the sneaker. As I was creating this sneaker-inspired nail art, I originally did one layer of white gel polish + clear acrylic powder, but the lines weren’t opaque enough and came out pretty flat. So I thickened the texture by repeating the process, which I walk through in the “Nail by Nail” section below.
Nail by Nail
First up, prep: buff and etch the nails!
I etch the underside of each nail using an e-file to help create a rough surface area so that the nails stay on for at least 2 weeks once applied. I then buff the top of each nail to ensure the gel polish does not peel off.
There wasn’t much variation within this set, so each nail design was achieved in the same way.
Continue reading for the step-by-step tutorial on how I achieved this nail art design.

All Five Nails:
- Clear base coat, 1 coat, cure
- Solid off-white gel polish all over the nail, 2 coats, cure between each coat
- Matte top coat, 1 coat, cure
- Using a dotting tool, paint medium-sized dots randomly on the nail using black gel polish, cure
- Flash cure in between every couple of dots to “freeze” them in place
- Clear builder gel, 1 coat, cure
- Glossy top coat, 1 coat, cure
- Paint abstract linework with off-white gel polish; do not cure
- Using a tiny scoop*, pour clear acrylic powder over the nail, focusing on the wet off-white lines; pour acrylic powder over the nail until the white polish no longer looks very shiny, fully cure
- Repeat steps 7-8, making sure to follow the exact pattern of the already cured off-white textured lines
Here are a few non-negotiable tips:
- Always follow the curing instructions based on the safety guidelines for each specific product.
- Use an appropriate UV/LED lamp – at least 48W. Those handheld flashlight ones and tiny 1-nail-at-a-time lamps do not completely cure gel polishes.
- Wear nitrile gloves at all times when handling gel products!
Here’s a step I never skip when making homemade press-on nails:
After each set is done, even when the non-wipe top coat is fully cured, there is likely some residue left on the press-on nails. So I do the following:
- Wipe each nail with a lint-free wipe dampened with 70% isopropyl alcohol.
- Follow with a second lint-free wipe dampened with water and a drop of Dawn dish soap.
- Finish with one final wipe using 70% isopropyl alcohol to ensure any residual inhibition layer is completely removed.
This gives me peace of mind that any residual inhibition layers are completely wiped off.
The Toolkit
Now that you know how I did this set, I’ll fill you in on all of the products I used below.
I know it looks like a lot of stuff (especially in the Base & Prep list), but most of these things are items you buy just once or a couple of times a year. They’re mostly items you likely already have in your DIY Press-on Nail Starter Kit.
Base & Prep:
- Full cover gel nail tips
- Nail stands
- Adhesives to secure the tips to the stand
- Disposable pads to cover the working area
- Nail Drill/E-file
- Nail drill bits
- Nail buffer blocks
- 70% Isopropyl alcohol
- Push-top container for alcohol
- Lint-free wipes
- Clear base coat
- Matte top coat (to layer underneath design work)
- Clear builder gel
- Nitrile gloves
Colors:
- Black – DND 888 Master Black
- Off-white – Yogurt Nail Grocery Light Ivory #02
Finishes & Effects:
Tools:
- Liner brushes
- Color mixing palette
- Metal cuticle pusher (tiny scoop for acrylic powder)
- UV/LED lamp
Top Coat: Glossy Top Coat – Kokoist Ultra Glossy Top Coat
